How to Import OLM Mailbox Items Into Office 365 (Outlook 2016)
Microsoft Outlook is available for both Windows and Mac users but both are different from each other in terms of file formats. Mac Outlook works with OLM file format and Windows Outlook stores data in PST file format. Sometimes, it may happen that users find a need to switch from Mac Outlook to Windows Outlook. In such a situation, you need to convert OLM to PST. With this article, we will show you various methods to perform the conversion.
There are many users who want to export OLM files to Office 365 but due to unavailability of suitable approach, they won’t be able to perform OLM to Office 365 conversion. Microsoft has no defined utility to transfer OLM files to Office 365 directly. In case of no direct solution, we will convert OLM files to Office 365 using –
Method 1. IMAP account configuration
This method is summarized into 3 stages –
- Configure Gmail in Mac Outlook
- Export Outlook Mac data to Gmail
- Configure Gmail in Windows Outlook
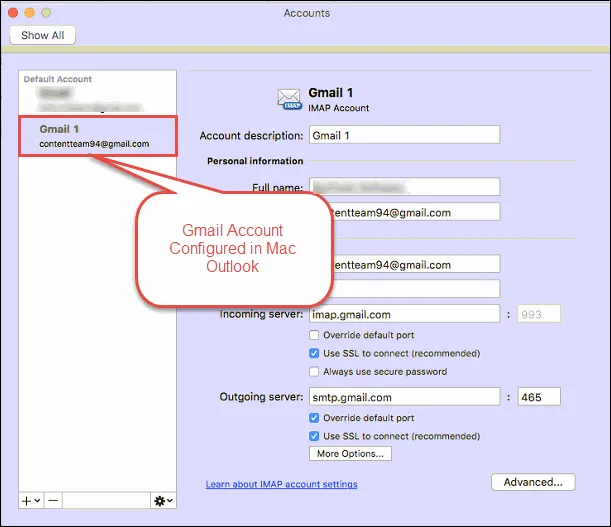
Steps to configure Gmail in Mac Outlook
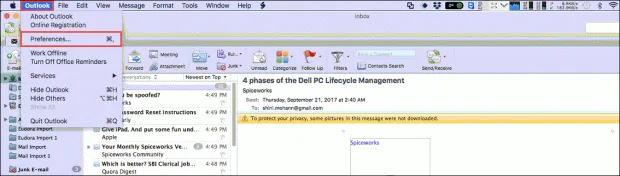
- Open Outlook for Mac and then go to Outlook tab and choose Preferences.
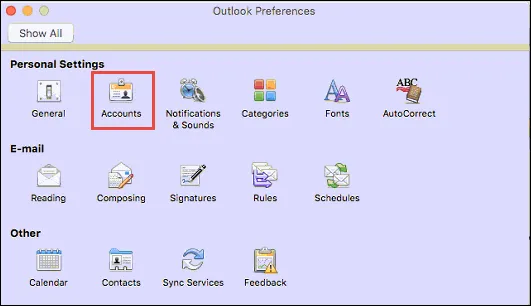
- Under Personal Settings option, select Accounts Option.
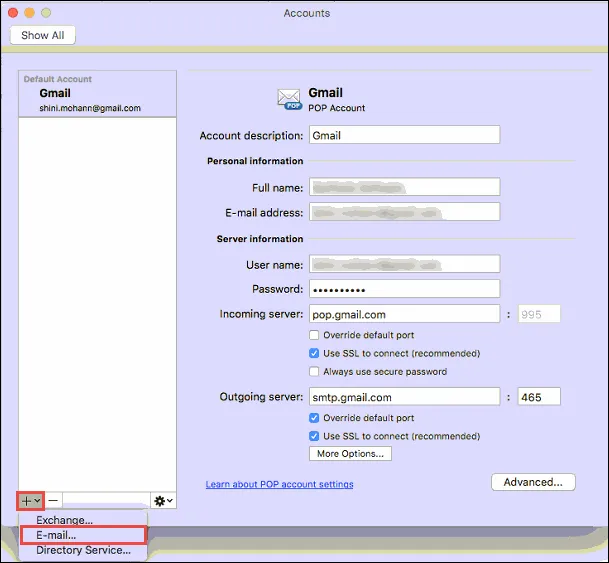
- Now, click on + icon and choose Email option.
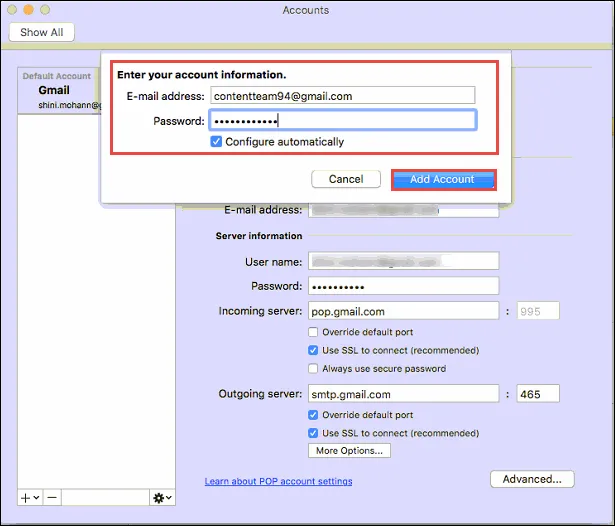
- Enter Gmail account username and password and click on Add account button.
- Your Gmail account will be added to your Mac Outlook profile.
Steps to export Mac Outlook files to Gmail
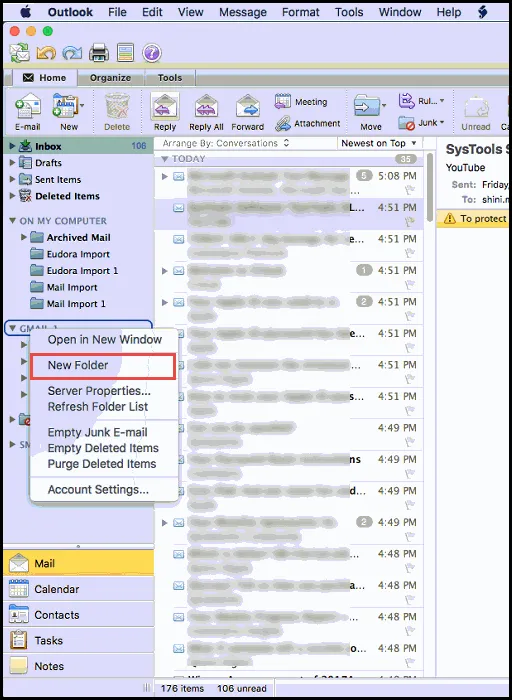
- Open Mac Outlook application. Right click the configured email account folder. Select New folder option.
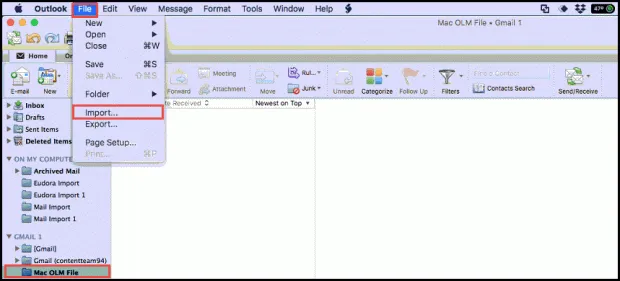
- Provide a name to the new folder. Click on File menu and then choose Import.
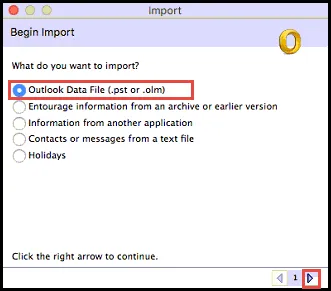
- An Import wizard will open, select Outlook Data File and click Next.
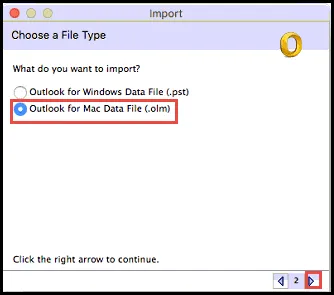
- Select Outlook for Mac Data file (.olm) option.
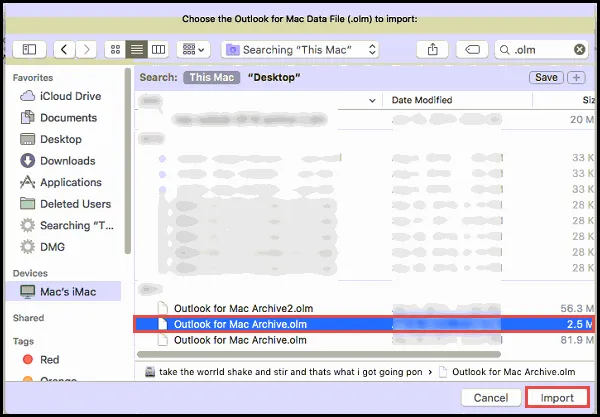
- Select the OLM file and click on Import option.
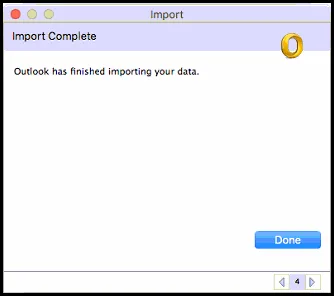
- Once the process gets completed, you will get Import Complete message. Click Done.
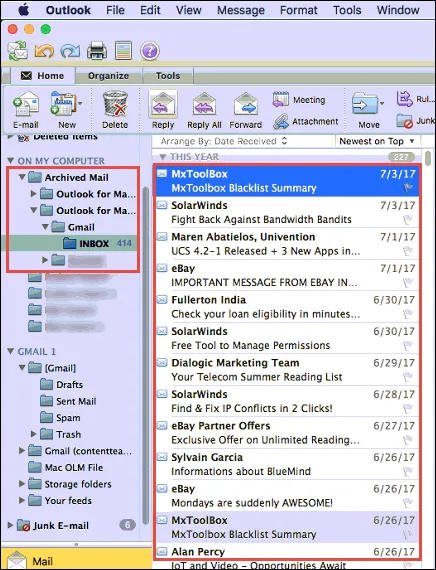
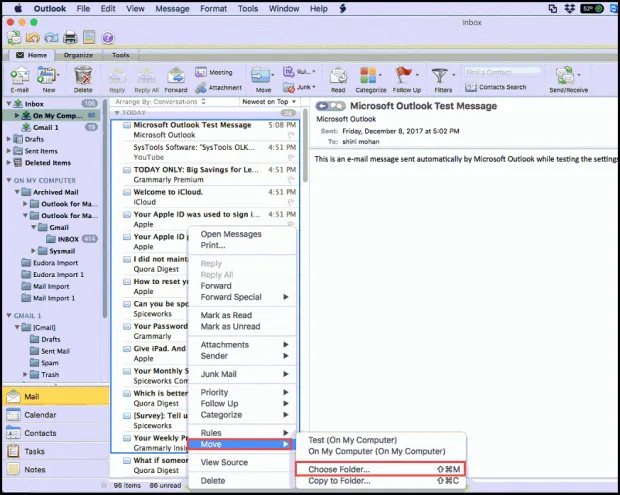
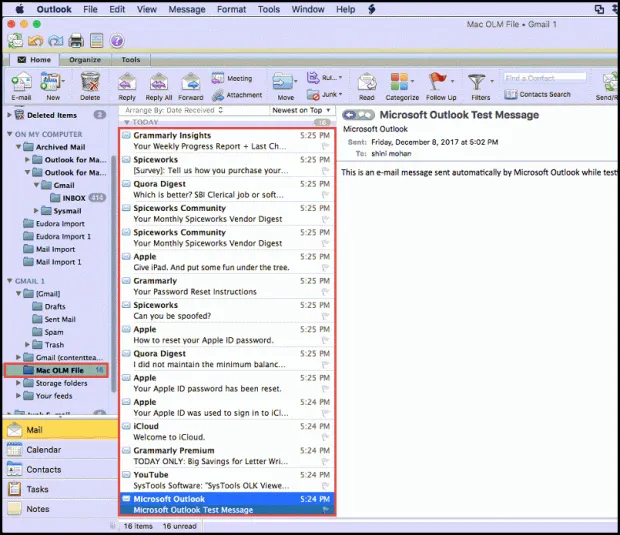
- You will find the import messages in Mac Outlook. Select all messages and right click on them.
- Select Move option and then select Choose Folder option.
- All emails are moved to the configured Gmail account.
Steps to configure Gmail account to Windows Outlook
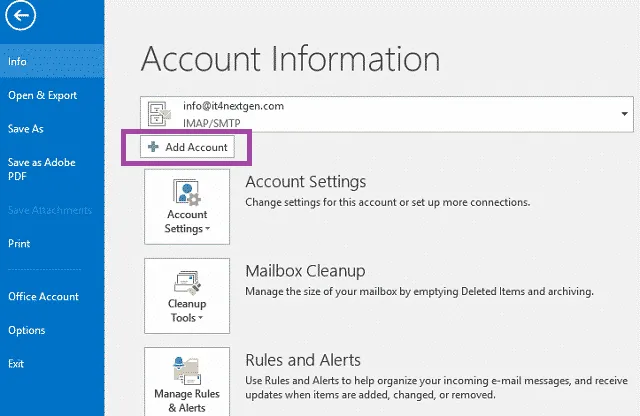
- Open Outlook 2016 application.
- Go to File menu then choose Add account.
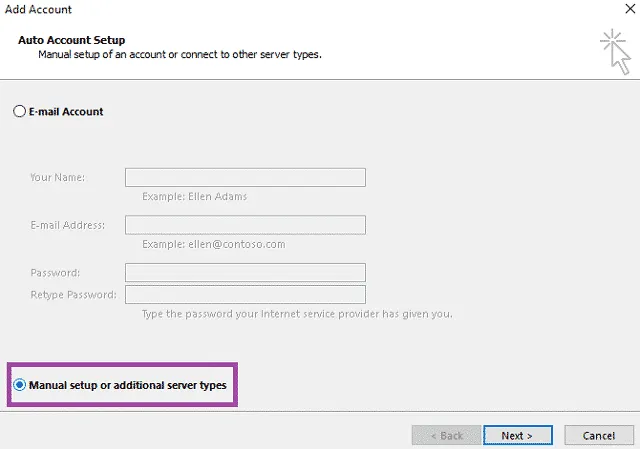
- You will get two options. Choose Manual setup or additional server types option.
- Select POP or IMAP option.
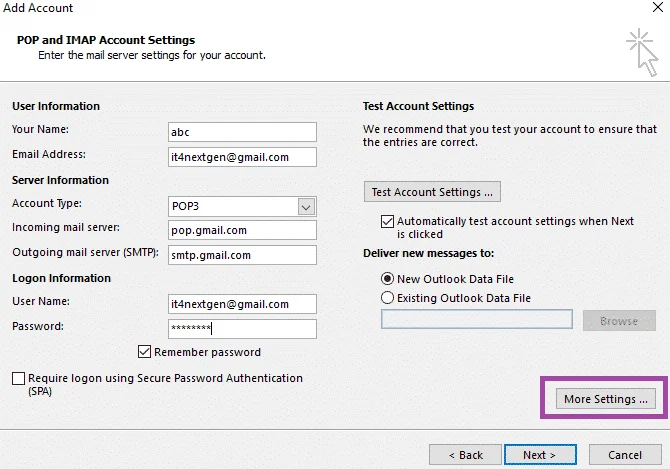
- Under user information, fill your name and email address.
- In Server information, select POP3 in account type. Fill pop.gmail.com in incoming mail server and smtp.gmail.com in outgoing mail server.
- In logon information, type your Gmail address and password.
- Click on More settings
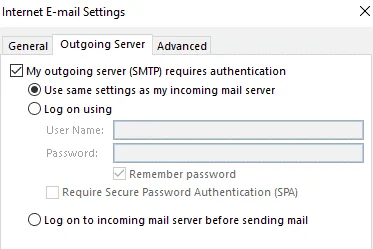
- In Internet email settings, open Outgoing Server tab and tick My Outgoing Server requires authentication.
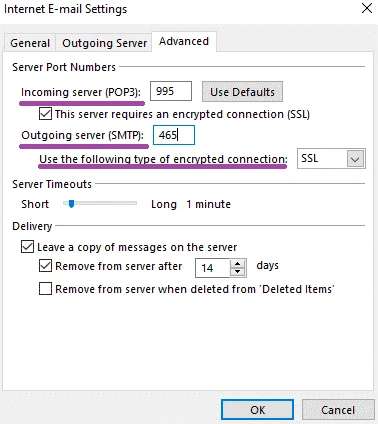
- In advanced tab, input 995 as Incoming Server and 465 as Outgoing Server. Also, make sure the option This server requires an encrypted connection (SSL) option is checked. Click OK.
Method 2. Professional solution - Mailvita OLM to PST Converter for Mac
If you don’t want to follow the lengthy manual solution as it is a time-consuming procedure so here is an alternate solution for you i.e. Mailvita OLM to PST Converter for Mac that convert Mac Outlook OLM files to PST format taking few minutes time. The software easily handles any size OLM file to export into PST format.
Highlighted features of Mailvita OLM to PST Conversion for Mac
- Convert all emails, contacts, notes, journals, calendars from OLM to PST
- Comfortably export any size OLM file to PST format
- Export selected or complete data of OLM file
- Single panel interface for easy handling by novice users
- Users can select items to export – Mails, contacts, calendars, tasks etc.
- User-defined output destination to save PST files
- Perfectly run on all Mac version platforms
- High speed conversion with full accuracy in results
- A free evaluation copy to test the software
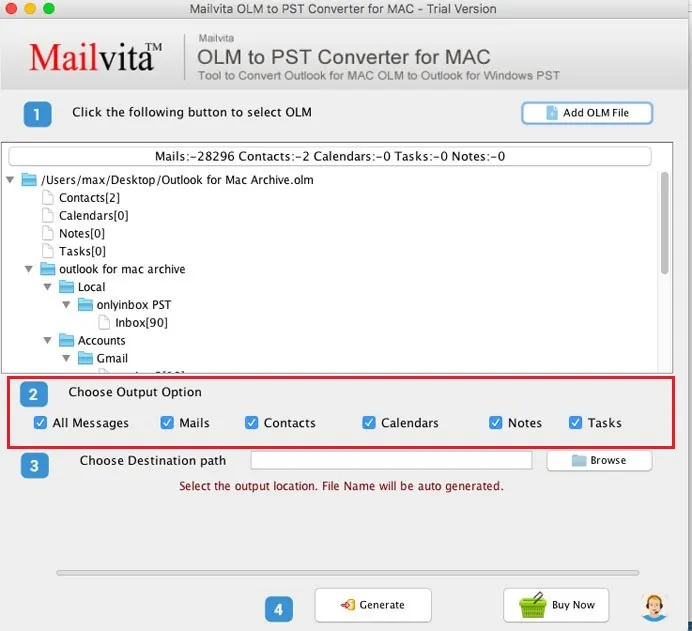
Step by step working with Mailvita OLM to PST Converter for Mac
With this software, there are only few steps –
- First of all, download, launch and install OLM to PST Converter on your Mac machine.
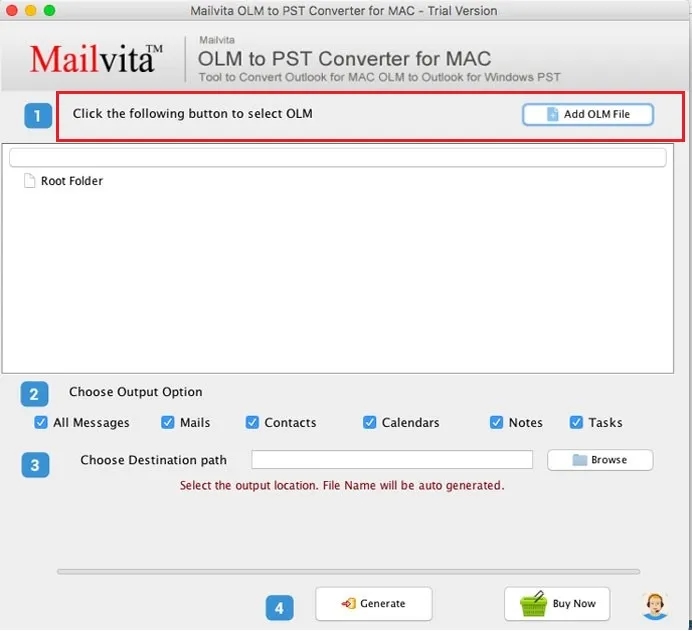
- Add OLM file whom you want to convert to PST format.
- Choose Output option – all messages, Mails, Contacts, Calendars, Notes, and Tasks.
- Choose an output location to save PST files. Click on Generate Now button.

Steps to import Outlook PST file in Outlook 2016
Follow the steps to import PST file in Office 365 –
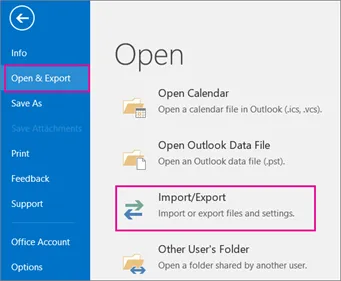
- Open Outlook application. Go to File menu.
- Click Open & Export and then choose Import/Export option.
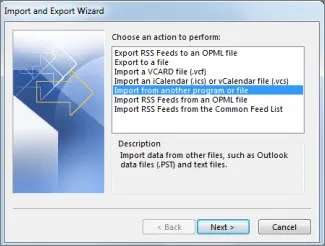
- Select Import from another program or file.
- Select Outlook data file (.pst) option.
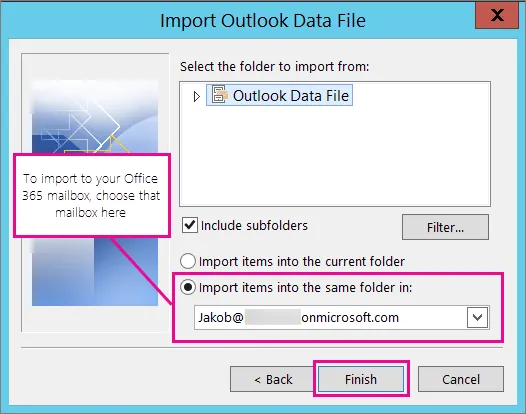
- Click on Browse button and select PST file whom you want to import in Outlook.
- Select a folder to save PST file in Outlook. Click on Finish button.


Conclusion
Mailvita OLM to PST Converter for Mac is suggested by professionals to convert any size OLM file without any technical expertise. Download the demo version for free evaluation to know the software completely before buying license version.