How to Import Windows Live Mail EML files into Mac Mail
Windows Live Mail to Mac Mail conversion is a common issue among users to export EML files to Apple Mail. There could be several reasons behind this conversion which we will discuss in this article along with the solutions to export WLM files into Apple Mail client. All the queries related to EML to Mac Mail conversion are also discussed in this section.
When users move to Mac OS from Windows WLM client, there arises a need to convert WLM data to Mac Mail to access previous emails in Mac Mail. Moreover, Apple Mail is a trusted email client with various security features to protect user mailbox items from unauthorized access.
Quick Procedure to convert EML data in Apple Mail
Here we are providing a quick procedure that performs EML to Apple Mail conversion. Find the complete steps with two simple stages for converting EML files in Mac Mail MBOX format.
If you have Windows Live Mail client so you need to extract EML files from it. And if you have EML files, you can simply go for conversion of EML emails into Mac Mail mailbox format using Mailvita EML to MBOX Converter for Mac.
Stage 1. Convert WLM mailbox data to Apple Mail Mailbox
Here are the steps with this application –
- Newly, download and install the application on your Mac PC.
- Run the utility and add EML files choosing either File Mode or Folder Mode.
- Set an Output location to store the resultant MBOX files.
- Finally, click on the Convert Now button to start the conversion process.
Stage 2. Import MBOX files in Mac Mail
Once Windows Live Mail EML files are converted to MBOX format. Let us import MBOX files in Mac Mail application with the following steps –
- Open Mac Mail application on Mac system.
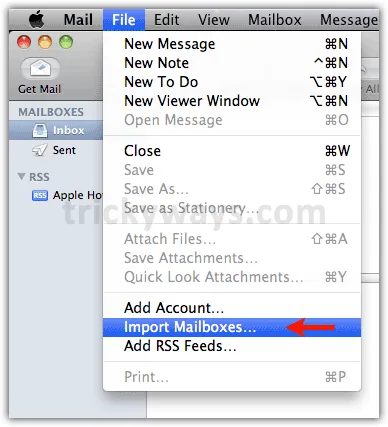
- Click on the File menu and choose Import Mailboxes option.
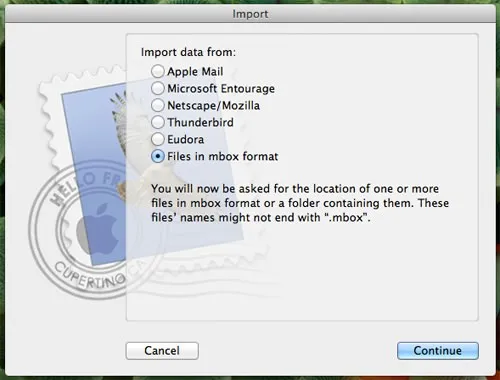
- Select Import data from: Files in MBOX format option.
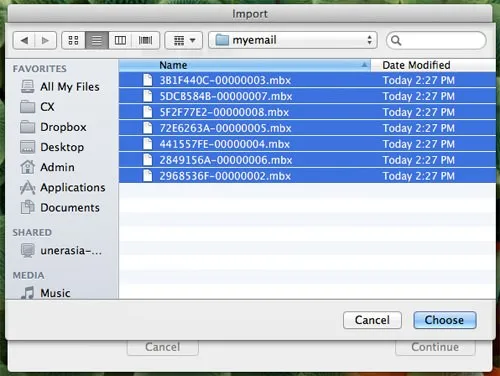
- Go to the exported MBOX folder and click on the Choose button.
- Wait for the MBOX folders import to Mac Mail. Once it is done, EML files are safely viewed in Mac Mail application.
Manual steps to transfer EML emails to Mac Mail
A manual process is also available to import EML files into Mac Mail but it is associated with some drawbacks. Let us discuss the solution and its demerits.
- If you have EML files located on your Windows computer, move these files to Mac Mail using the secondary storage device like a pen drive.
- Now, open the folders where EML files are stored.
- Select EML files and move them to Apple Mail mailbox folder. You can simply drag and drop EML files to Apple Mail.
If the manual solution is available, why go for software approach?
No doubt the users can choose manual solution but the major drawback with the manual approach is it is beneficial only when you have 15-20 EML files with you. In case, you have a huge bulk of EML files, you need to move to the third-party approach that will provide safe, quick and perfect results in a short time period.
Final Note
If you want a secure and highly result-oriented solution, then you must go for the third-party solution discussed in the write up with proper working. As we have discussed that manual solution is for less amount of data only.